Wednesday, April 18, 2018

2018 Second Quarter Finish Along

Here is my list for the 2nd Quarter...


I'm sticking to 20 items again...it seemed to be a reasonable amount last quarter...so here they are:

  1. White Scrap Basket
  2. Wayne & Gordie Quilt
  3. Indah Batiks quilt
  4. Charity Pillowcases (4)
  5. Adore Floral Quilt
  6. Scout Tee (stripped cotton)
  7. Christmas Place Mats (Can I finish them before December this year?)
  8. Sorbetto Tank (floral cotton)
  9. Martini Skirt
  10. Color Play Mini
  11. Scrappy TV Dinner Quilt
  12. Modern Courthouse Steps
  13. Wayne & Gordie left-overs pillow
  14. 1600 Log Cabin
  15. Cell Phone Purse (3)
  16. Pink Cats
  17. FQS 2014 BOM
  18. Tickled Pink 2017 Mystery
  19. Scandinavian Tomte
  20. Iris Log Cabin
Wish me luck! And good luck to all the other Finish-Alongers!


Sunday, April 1, 2018

Finish No. 7 - 1st Q

This is last of the five pillowcases on my 1st Quarter List...


But all in all I finished ten (nine in the picture) sets!  Like I said earlier...a pillowcase bonanza!


Some Stats for the quilt:
Size: Standard Pillow
Quilting: None
Started: 03/31/18
Finished: 03/31/18 (It was a very productive Saturday!)

This makes finish #7 for the 1st Quarter...and 13 remaining on the 1st Quarter FAL List.

Finish No. 6 - 1st Q

This is the 1st of the last two of the five pillowcases on my 1st Quarter Finish-Along list...whew that was a mouthful...

Let's just call them the pillowcases that match my Feathered Bed quilt (I finished in 2016) made with all sorts of Denise Schmidt fabrics..

Or just the green plaid pillowcases...


Some Stats for the quilt:
Size: Standard Pillow
Quilting: None
Started: 03/31/18
Finished: 03/31/18 (nothing like waiting until the 11th hour!)
Fabric Used: Denise Schmidt and some basic brown cross-hatch from JoAnn's

This makes finish #6 for 2018...and 14 remaining on the 1st Quarter FAL List.

Finish No. 5 - 1st Q

This is my Modern Plus quilt...I L-O-V-E how it turned out!

This is the third (but second finished) quilt I quilted on my Gammill.  I tried to do straight lines quilting, and quickly embraced the idea of straight-ish line quilting!


I love it!  By the bottom of the quilt, I was much straighter...and quite a bit more consistant in the spacing.


After seeing Angela Walters' leafy meander, I tried that in each of the pluses...again, practice makes...well, better.  I used matching variegated thread in the pluses...really fun looking, but the changing of thread was kinda a drag...and my least favorite part of tying off the threads, well let's just say that doesn't always happen!

Some Stats for the quilt:
Size: 67X70
Quilting: on my Gammill, staright-ish lines and leafy meander
Started: 09/10/17
Finished: 03/30/18

This makes finish #5 for the 1st Quarter...and 15 remaining on the 1st Quarter FAL List.

Monday, March 26, 2018

Finish No. 4 - 1st Q

This is the third set of pillowcases on my Finish Along list (just two more to go....).


It is so easy to cut out (or set aside to cut out later...procrastinate much) matching fabrics to the quilts I am working on...so for these, the matching quilt is also on my Finish Along list.  I did get the top finished this quarter, but i don't think I will be able t o get it on the frame and quilted...oh well, it will slide on over to the 2nd Quarter list!

Some Stats for the quilt:
Size: Standard Pillow
Quilting: None
Started: 01/11/18
Finished: 03/24/18
Fabric Used: Art gallery fabric by Sharon Holland...but I don't remember the name of the line...

This makes finish #4 for 1st Quarter...and 16 remaining on the 1st Quarter FAL List.

Finish No. 3 - 1st Q

This is another set of pillowcases...I was on a pillowcase roll this month!  Its a great way to buy and quickly use the newest cutest fabrics...without adding a giant project to the WIP pile...


These pillowcases will match the Christmas quilt I am making for my bed...which is also on my Finish Along list...but far from finished...

Some Stats for the quilt:
Size: Standard Pillow
Quilting: None
Started: 01/11/18
Finished: 03/24/18

This makes finish #3 for the 1st Quarter...and 17 remaining on the 1st Quarter FAL List.

Finish No. 2 - 1st Q

This is my Easter set of pillowcases...in flannel!  Super soft, and finished up with a week to spare before Easter...and the close of the 1st Quarter Finish Along!


Across the top of the Easter pillowcase, is a set of Valentines case (not on my original finish along list, but nonetheless done) which will have to wait until next year to see any use....


Some Stats for the quilt:
Size: Standard Pillowcase
Quilting: None
Started: 1/11/18
Finished: 3/24/18
Fabric Used: I'm so bad at taking note...but it a beautiful soft flannel from my local quilt shop

This makes finish #2 for this quarter...and 18 remaining on the 1st Quarter FAL List.

Monday, March 12, 2018

Finish No. 1 - 1st Q

This is a scrap quilt I have been calling Dapper Dan.  I used this as my first project quilted on my new-to-me Gammill Long-Arm!

I tried somthing different in each rectangle...to get a feel for how the machine works...and how to work the machine...

Some circles...were more square...


Squares...were mostly square...


Serpentines...reallly need some work.

But it was a fun experiment!  I'm anxious to get all of my tops on there and get some more practice in!

Some Stats for the quilt:
Size: 61" X 68"
Quilting: On my Gammill, all kinds of test patterns
Started: 05/31/16
Finished: 03/11/18


This makes finish #1 for the quarter...and 19 remaining on the 1st Quarter FAL List.

Monday, January 15, 2018

2018 First Quarter Finish Along

Well, I'm back at it again....after taking a little break at the end of last year (for two house moves and one office move! Yikes!)

Here is my Finish Along list for the 1st Quarter of 2018 (let this be the year I successfully finish more than I start!)

Adore Floral, Indah Batiks, Wayne & Gordie, 1600 Log Cabin, 5 Pillowcase Sets, White/Tan One-Hour Basket, Christmas Place-mats, Campus Cats, Oh! My Stars, Batik Perennial Star Pillow, 2014 FQS Mystery, Scandinavian Tomte, Modern Plus, Dapper Dan, Iris log Cabin, 2017 TP Mystery

Twenty items, wish me luck!  And Good Luck to all the other Finish-Alongers out there!


Wednesday, January 3, 2018

Piped Binding

If you've found your way here from the Moda Bakeshop...welcome!  I can't take credit for this piped binding method, entirely...its a mash-up of online tutorials, hints from friends, advice from teachers...and a lot of practice!

I hope you find it helpful...


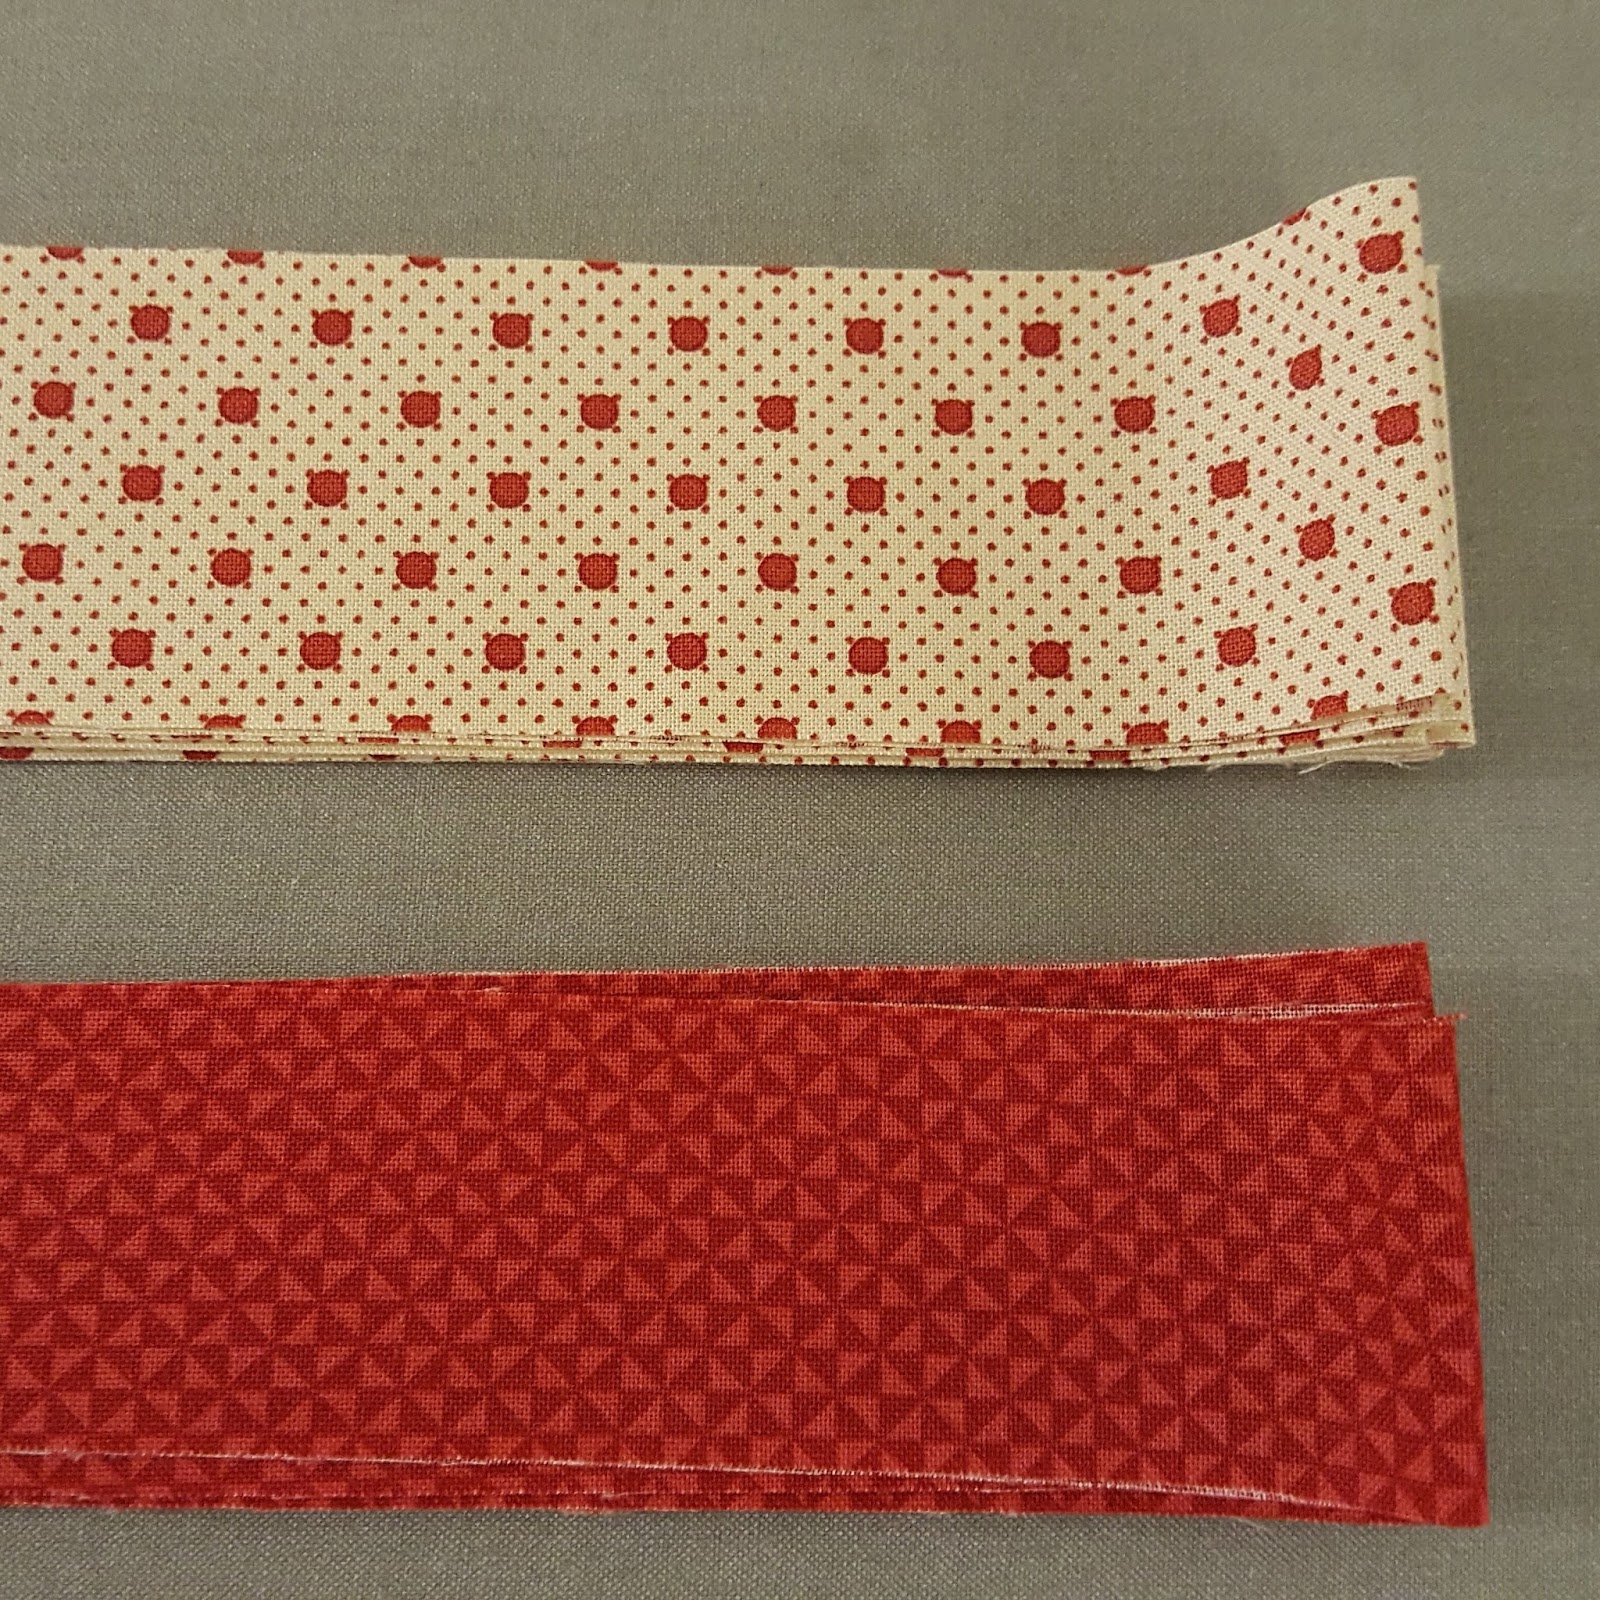
First decide which of two fabrics you want to be the piping and which will be the binding.

Cut the piping strips 1 3/'4" X WOF
Cut the binding strips 1 1/2" X WOF
(a hint: just remember it makes no sense, the part the shows the least is cut the widest...)


Sew both the piping strips and the binding strips together, end to end, with a mitered join.


With right sides together, cross two strips at 90 degrees...


Mark a line between the two inside corners...


Sew a hairs-width to the outside of the marked line...


And repeat....repeat....repeat...until all the strips of piping and binding are sewn into two very long strips.  Press and trim the miters.


with the binding (narrower) strip on top of the piping (wider) strip, sew the entire length of the two strips with a 1/4" seam.


At your pressing board, again with the binding (narrower) fabric on top...


Press the piped binding open with the seam towards the piping (narrower) strip.


Flip the pipied binding over and press in half lengthwise.


See how cool that little bit of contrast is....and being able to bind the entire quilt on the machine more than makes up for the additional time it takes to prepare a piped binding!


(Don't forget to neatly roll-up the cool piped binding...snap a photo....and post is on social media!  It's so satisfying!) #quiltingrules


Sew the piped binding face down on the BACKside of the finished quilt top.  This feels so counter-intuitive, but absolutely necessary!


Be sure to leave about 18" of unsewn binding at the beginning.  You will need this to make a neat mitered join to the end of the piped binding.


After sewing the piped binding around the entire quilt...leave another 18" of unsewn binding at the end.


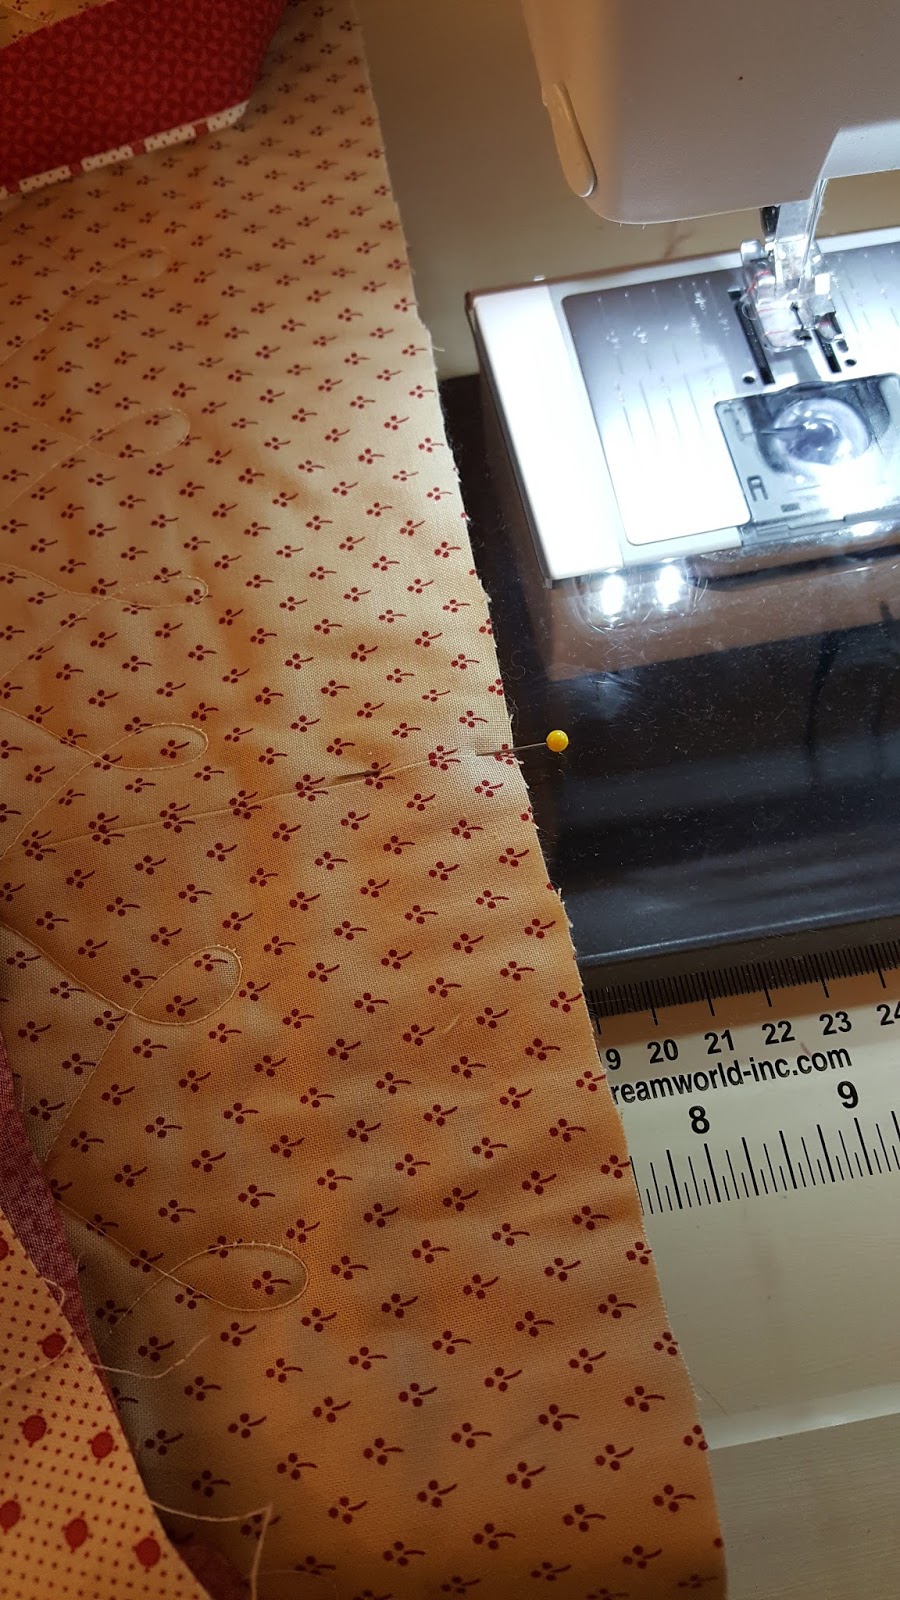
Place a pin in the edge of the quilt about half way between the beginning stitching and the end stitching...


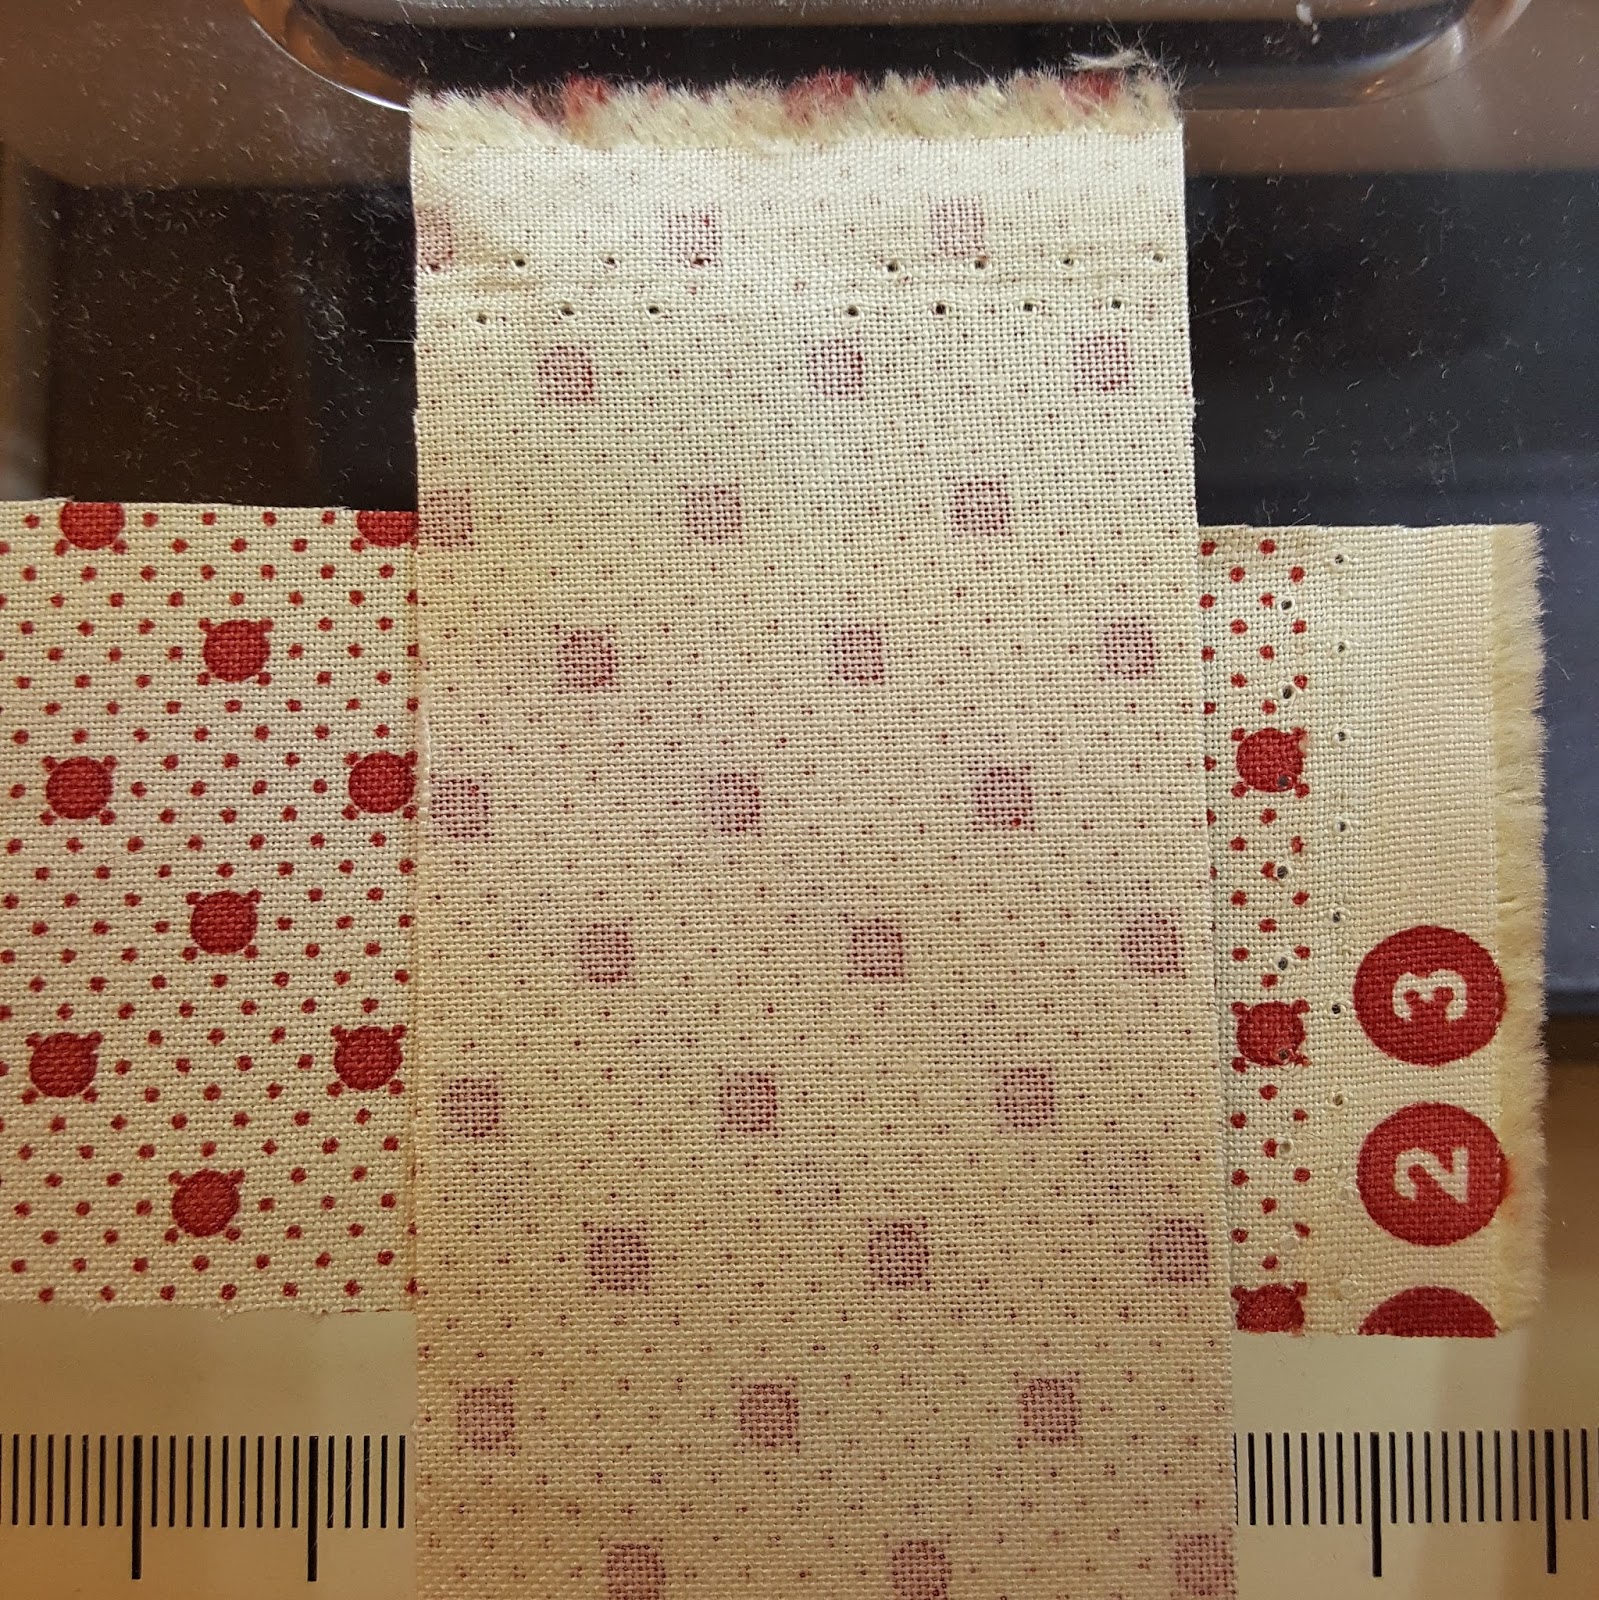
Measure the width of your folded binding...mine measures 1 3/8" wide.


Lay the binding flat on the quilt and measure 1 3/8" (or whatever your measurement is) PAST the pin.
repeat for the other end of the binding...


And trim both ends on the marked line.


Unfold the end of the binding (that is coming towards you) and lay flat...


Place the other end of the binding, also unfolded, right side down, at 90 degrees, on top...be careful not to twist the binding.


Mark a diagonal line from top right to bottom left of the overlap, and sewn a hairs-width to the outside of the marked line.


Open the miter BEFORE you trim to make sure there are no twists in the binding, and that the piping and binding match up.  If everything looks good, trim the miter...


Lay the joined binding down on the quilt top (it should fit exactly now) and finish sewing.


Turn the piped binding to the front of the quilt, and using a "stitch in the ditch" foot and thread that matches the fabric of the piping, stitch down between the piping and the binding.


Easy peasy...one, two, threesy!


Thanks for stopping by...now get out there and finish binding those quits!