Friday, September 24, 2010

Frugal Friday: Home Made Holiday Envelopes - Part 2

Big

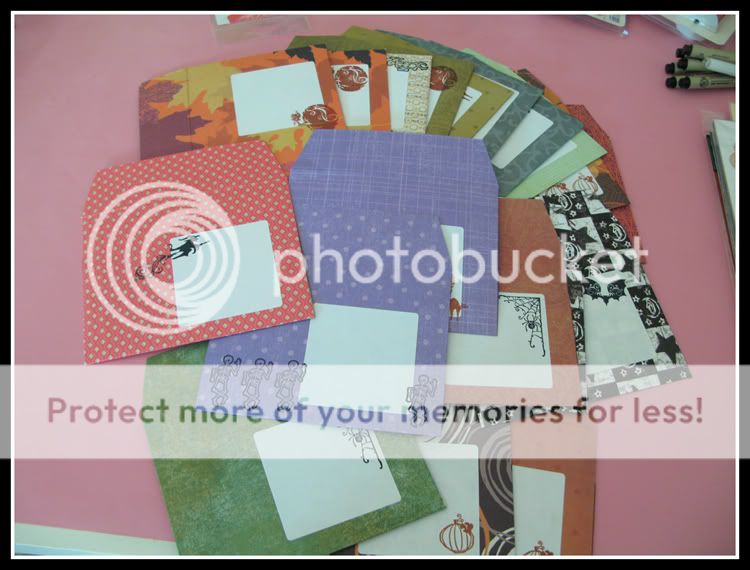
This week I am going to show you part two of making your own holiday envelopes, lick & stick glue.

The recipe is pretty simple, gather up your ingredients:

Photobucket
Homemade Holiday Envelopes
Small Paintbrush
White Vinegar
Unflavored Gelatin
Flavored Extract (optional)

In a small saucepan, bring 6 tablespoons of vinegar to a boil, then reduce the heat to low.
Photobucket

Add four packets of unflavored gelatin to the vinegar, and stir until the gelatin is dissolved. The smell is pretty strong and vinegary…do not inhale, in fact I turned on my stove fan to suck up as much of the smell as I could.
Photobucket

Remove the pan from the heat and add a tablespoon of flavored extract, if desired. Mix well.

Determine the overlap of your homemade envelope. If you are using the .pdf I designed, the overlap is approximately ½ inch.

Using a small paint brush, apply a strip of the glue to the top edge of the envelope flap and let dry.
Photobucket

Photobucket

When you are ready to use the envelope, simple lick (or otherwise lightly wet) the glue and seal….simple!

You can store the left-over glue in a small container. When the glue has cooled, it will be thick and semi-firm….to use it again, simple heat the container in a small bowl of warm water. Do not add water to the glue to thin it out.
Photobucket

So was the experiment worth it? Here is the tally:

Cost: I had a bit of trouble finding the unflavored gelatin, but a box of 32 packets (way more than I needed) was $9. Otherwise, the other ingredients were in my kitchen cabinets.
Time: The cooking part of making the glue only took a couple of minutes. Applying the glue to 23 envelopes…another five minutes.
Skill Level: basic

There you have it, Lick and Stick Glue…easy peasy and cheap cheap!

Monday, September 20, 2010

A New Set of Foster Kitties

So I had a sad Sunday...I had to say goodbye to my first set of foster kitties...


I had them just about a month, and of course, found myself very attached to them...they are so sweet!

But I also know that the new kitties need me even more...so now it is their turn!

There are eight new fur-babies...and they are so tiny! I haven't weighed them yet, but I don't think they are even a pound...just fluffs of fur!

There is a group of five...two torties, two tabbies...


And a black one (that looks a whole lot like Grizzly from my first set of kitties...except this one has green eyes)


Theses five are being kept separate from the others for the next couple of weeks, just to make sure they are all healthy before everyone is integrated.

There is also a set of two black and white kitties, also being kept separate...

This kitty is going to be a handful! So much energy...and so tiny!

And one lonely little kitty, all by himself...


So far (after a whopping 24 hours with me) they are very timid and un-socialized...but I'm working on that! A few have started purring for me, and one even came up to me of his own free will this afternoon...maybe in a week they will actually start playing with me.

I'll keep you posted...

Friday, September 10, 2010

Frugal Friday: Home Made Holiday Envelopes - Part 1

Big

Like I said last week…I am really in the mood to start my Halloween projects.

This week I am going to show you part one of making your own holiday envelopes.

This is a link to the .pdf of the envelope I used in this tutorial, but I wasn’t completely happy with it…so I fidgeted on my computer last night and made my own version (.jpg version and .pdf version), which I think works a bit better. And then I went a bit further and converted the image to .gsd, for anyone using a Silhouette die-cutting machine.

First I gathered up a bunch of Halloween and Halloween colored papers and trimmed them all to 81/2” X 11”, so they will print on my desktop printer.

Photobucket

I printed the .pdf of the envelope onto the white side of the papers, or if it was a double-sided paper, onto the lighter side.

Photobucket

I trimmed out all the envelopes…by handall 23 of them! Which is why I made a .gsd version for making my Christmas envelopes!

Photobucket

I scored and folded them on the printed score line (light gray).

Photobucket

If you can’t see the score line on the patterned paper, it is fairly obvious where the fold needs to go…simply fold in all the ‘tab’ parts.

Photobucket

I placed a double-sided adhesive, 3M Scotch Brand, on the bottom ‘tab’, lining up the edge of the tape with the paper.

Photobucket

And folded the bottom up adhering it to the two side ‘tabs’. Super simple!

Photobucket

Since I used heavily patterned paper for my envelopes, I added a mailing label on the outside…

Photobucket

And decorated them with some Halloween themed stamps.

Photobucket

Photobucket

So was the experiment worth it? Here is the tally:

Cost: I used a bunch of papers I had on hand, all were 12X12 cut down to 8 1/2X11…and I kept the scraps to use for the matching cards.

Time: I spent close to two and a half hours….but I got 23 envelopes made.

Skill Level: super basic

There you have it, Homemade Holiday Envelopes…easy peasy and cheap cheap!

And be sure to come back next week and check out the final step for your homemade envelopes…lick & stick glue!

Wednesday, September 8, 2010

Birthday Layout

So I went home last night...did a little futzing around in the house, and then headed out to the studio to visit with the kitties and get some scrapping done.

After lounging in the sunny patch with the kitties...


I made a list of all the projects and layouts I have that are hanging around 99.9% complete...

Then started tackling the list.

On top of the list was putting the final faux stitching touches on a layout of my Niece's fifth birthday party...


...check that off the list...


...then I added the final button touches to a layout of my Joshua Tree National Park pictures...


...check that off the list...


...and I finished the title for my Going for a Ride layout...


...check that off the list...


...then I lounged with the kitties some more...


...and went back inside feeling like I actually got a lot done!

Whew!

Tuesday, September 7, 2010

Lots of crafting...not so much posting...

Well I have been getting a lot of crafting done lately...especially with the foster kitties in the studio...

Really, I have...

I go out and spend at least an hour or two each evening after work visiting with them and scrapping...

And I have a new scrap-buddy...June Bug!


She is really...helpful. Helpful and stealing small scraps of paper, really helpful in laying on top of my supplies to make sure they don't float away...


....and really helpful with keeping me completely entertained!

I may not be working very fast, but at least I am working!

The project she is helping me with, in the pictures, is a mini album of the pictures I took in Tahoe on the Lake Tahoe bike trail...I am so close to being finished with it...just a bit of journaling left to do...I will post it later this week.

I also made this card a few weeks ago, without June Bugs help, for my niece's 5th birthday. My niece asked for art supplies for her birthday...and who better to ask than crafty aunt-y catinthegrass!


I found the cute little crayon die-cut in the Silhouette store and immediately knew I needed to cut some for her card!

I am finishing up the scrap layout from her party...and used another crayon die-cut on it...I will upload the picture tomorrow!

Here's to being busy!

Friday, September 3, 2010

Frugal Friday: Glittered Embellishments

Big

I am so very in the mood for Halloween. It is one holiday that just screams for sparkles and bling! And what can I say…I love green and orange!

I have been scouting out all the new glittered Halloween embellishments online and in the stores, like these from Making Memories and Doodlebug Designs…

Photobucket Photobucket

And wanted to try to make some for myself…so I gathered up the following:

Glitter, flocking powder and glittering tray (although generally, I just use a piece of scratch paper)

Photobucket

My handy 5” Xyron and my Xyron X

Photobucket

An assortment of die-cuts I cut using my Silhouette machine.

Photobucket

Run the die cuts through the Xyron, making sure the side you want to be glittered is face down (in a lot of cases this won’t be an issue, but it is a must to remember if you are glittering letters or stack-able shapes)

Photobucket

Remove the die cut from the release paper

Photobucket

If there are lots of glue ‘webs’ simply remove them. I use my awl to pull them away from the shape.

Photobucket

Then shake the glitter on top of the sticky side…after applying the glitter, I usually tap off the excess and them smoosh the shape back into the glitter to make sure everything is covered.

Photobucket

And finally spray a sealer over the top of the shape, I use Aileen’s Matte Sealer, to ensure the glitter stays where it is needed and doesn’t flake off onto your hands…and counter…and floor…and clothes…and cats…sigh!

Photobucket

I also tried this with some stack-able shapes.

Photobucket

I ran the bottom piece through the Xyron...

Photobucket

And adhered the top piece.

Photobucket

You can see the cut out areas that are left are perfect for glittering.

Photobucket

Apply the glitter…

Photobucket

Keep away from cats…

Photobucket

And remember to spray with the sealer after you glitter…aren’t these fun!

Photobucket

Here is a stack-able howling wolf die cut. First I sprayed my moon with some Glimmer Mist and homemade Shimmer pray…but the sparkle wasn't enough...

Photobucket

So I placed the moon face down in the Xyron…

Photobucket

And added glitter.

Photobucket

As you can see, the Xyron doesn’t always cover the die cuts perfectly. You have two options here…leave as is, which for my moon looked pretty good or go back into the shape with a liquid glue pen and fill in the missing spots. Whatever you do, do not run the glittered shape back through the Xyron…it just doesn’t work, trust me!

I also tried this technique with flocking powder on the body of my sheep die cut, and it worked pretty well…flock is odd though, and I never seem to get really good coverage…but it basically worked. (I flocked the ears using a glue pen, not the Xyron)

Photobucket

And one final trick to try, combine two colors of glitter or glitter and flock on the same shape…just remember to keep the areas not being glittered covered with the release paper.

Photobucket

Photobucket

Photobucket

So was the experiment worth it? Here is the tally:

Cost: $0...I had everything on hand..and finally I feel better about using all the glitter I bought over a year ago!
Mess Factor: Pretty high! And a word of warning…glue, glitter and kittens do not mix!
Time: I spent a fair amount of time doing this…including the clean-up..about 2 hours to cut and glitter the spiders, the witches feet, the flocked sheep, the howling wolf and the angel phrase.
Skill Level: basic

There you have it, Glittered Embellishments…easy peasy and cheap cheap!